
Kitchen and fitted furniture install: geometry before the front
A beautiful front will not save a crooked carcass. On a premium kitchen and fitted furniture, geometry reads first: worktop horizon, door line, gaps and how appliances sit.
The real question is whether to build the volume to a laser datum zero — or keep packing wedges after install.
Here is installation as engineering: datum, soft-close hardware, coplanar fronts, service cutouts before production, and a handover checklist.
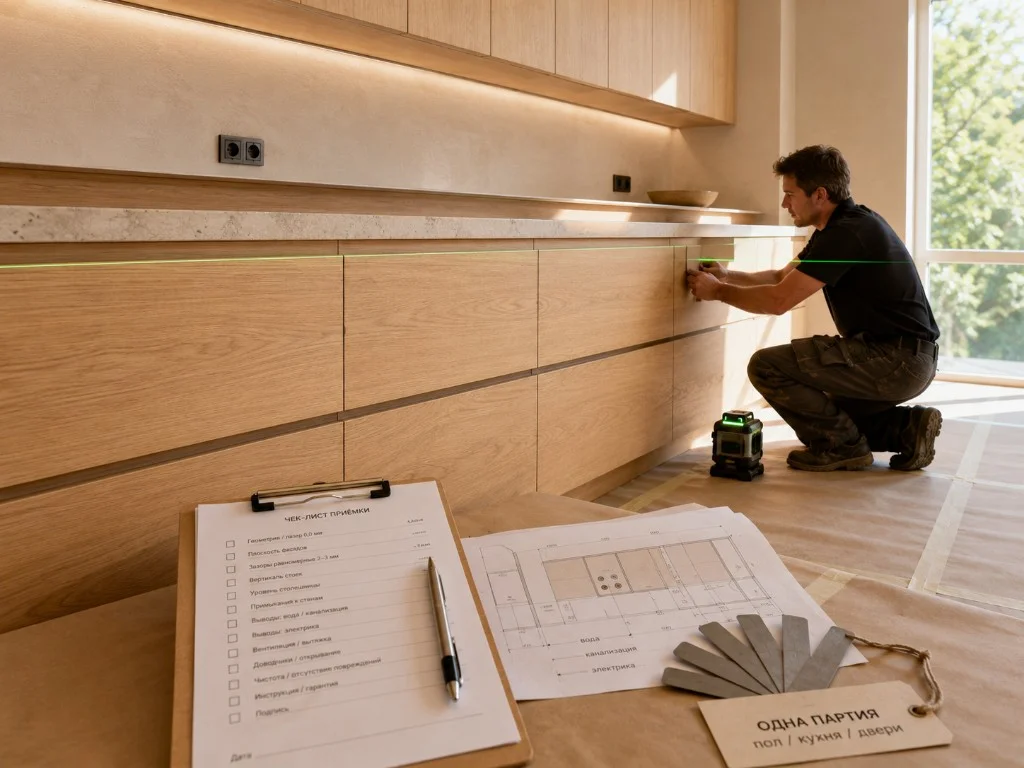
Kitchen and fitted furniture install in our contour is not “deliver and set”. It is tying the piece into room architecture: windows, openings, floor, ceiling, wall axes.
Cardinal Hall installs in-house production to the site method sheet. A third-party carcass without a joint and tolerance audit does not enter that logic by default.
At the door there is one fork: either geometry is locked before the shop (including cutouts for water, electrics and ventilation), or the job becomes on-site fitting. The second path in premium work is usually costlier and looks worse.
Why a laser datum zero before the first carcass?
We set datum zero with a laser before the base run goes in: worktop horizon, module axes, alignment to window and door opening. Base units sit on adjustable feet — but feet do not replace the room’s common plane.
Floors are protected; site humidity is logged. If substrate or wall tolerances fall outside the card, install does not start: otherwise fronts drift after appliances go in and the worktop “floats” against the sill.
Datum links kitchen to floor and doors. When parquet and fronts share a single batch, a horizon error shows at once — as a step in tone and line.
Why service cutouts before production?
Water, electrics, ventilation and extraction set holes, niches and carcass reinforcement. Cutting “as found” on site risks edges, moisture protection and neighbouring module geometry.
At survey we capture riser axes, sockets, outlets and finished floor height. In the shop we lay in cutouts, embeds and service access — so install stays assembly, not joinery in living-room dust.
Moving a sink or hob 30 mm after fronts are finished is already another order. Better to lock the diagram before the batch runs than to “nudge it a little” at handover.
How does the carcass carry load and hardware?
We fix carcasses to load-bearing walls with concealed brackets and reinforcement at worktop, wall-unit and integrated-appliance zones. Side panels 18–19 mm are a working stiffness guide under solid wood and heavy fronts.
Hinges and runners are soft-close: closing feel should match across the whole front. Mixed hardware in one run is felt by hand and heard.
Junctions with floor, skirting and panels follow the project profile — no scrap fillers on site. Otherwise the gap wanders in a season and the shadow line becomes a crooked shadow.
What does “coplanar fronts” mean?
Fronts are hung after final carcass geometry check. Even gaps between doors; one front plane to a laser rail — no “steps” or twists.
Ceiling compensation and wall junctions are drawn in. Trying to straighten a crooked opening with fronts alone ends in gaps and skewed handles or machining.
On a handle-light kitchen a plane error is more obvious: the eye reads shadow and the wall joint. So a “fashionable” front needs the same discipline as classic framing — only stricter.
Can you install a kitchen yourself?
On a simple flat-panel carcass, basically yes: set level, fix, hang fronts per the guide. On a true base without complex appliances that is realistic.
In practice, without experience it is easy to stack axis error, drop a corner at the sink, over-clamp a worktop or hang fronts before the carcass has settled. Fitting oven, dishwasher and hood without cutouts on the card often spoils edges and geometry.
If the run is solid wood, fronts flush with the wall, appliances are dense or you are unsure about datum zero — better professional install. Laser and protocol first, pretty door second.
What is on the handover checklist?
Opening and soft-close on every front and drawer, even gaps, floor and wall junctions, appliance fit in openings, no carcass play, finish care schedule.
We hand over a protocol and service contacts for seasonal adjustment. Install price and timeline — after survey and trade readiness, in the contract; no blind “from $X per metre” rates.
The kitchens catalogue is the project entry. Floor logic tied to the kitchen is in the single-batch floor + kitchen piece.
In brief
Where does kitchen installation start?
Why not cut services on site?
What are coplanar fronts?
Do you install third-party kitchens?
Can you install a kitchen yourself?
What is checked at handover?
Need a site diagnosis — describe the floor or joinery.
Request a quote